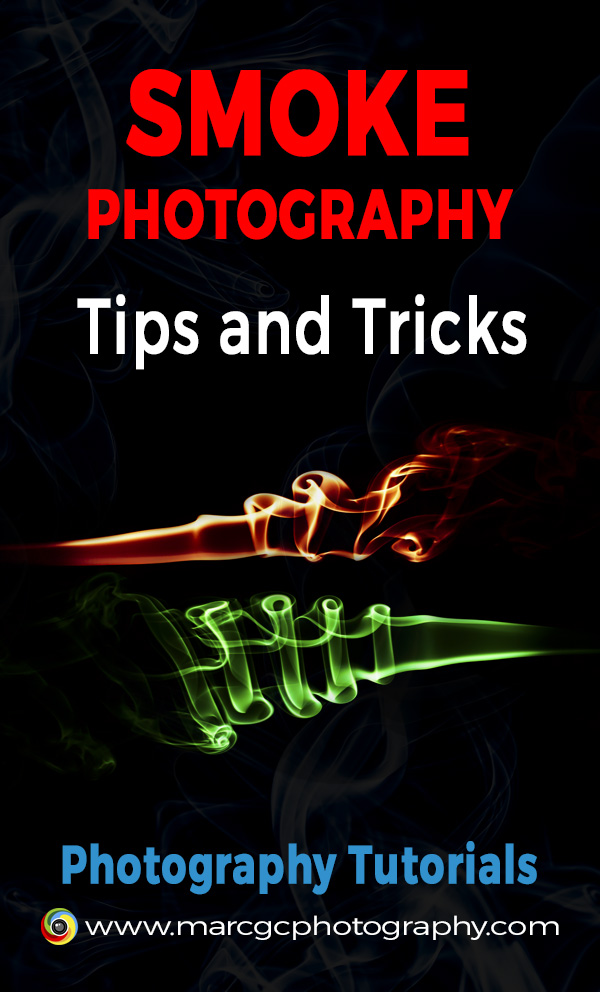
Smoke Trails Photography
Do you like abstract art? Have you ever seen smoke photos? Smoke patterns are interesting and eye catching; they are the perfect subjects for fine art.
I have been photographing smoke trails for a long time and in this article, I will show you how to use the best light to capture the smoke, the best camera settings, and provide guidance on the post processing to enhance your final image.
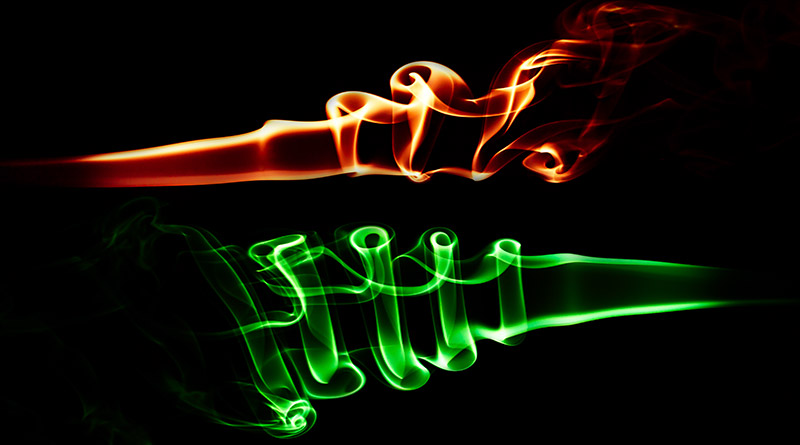
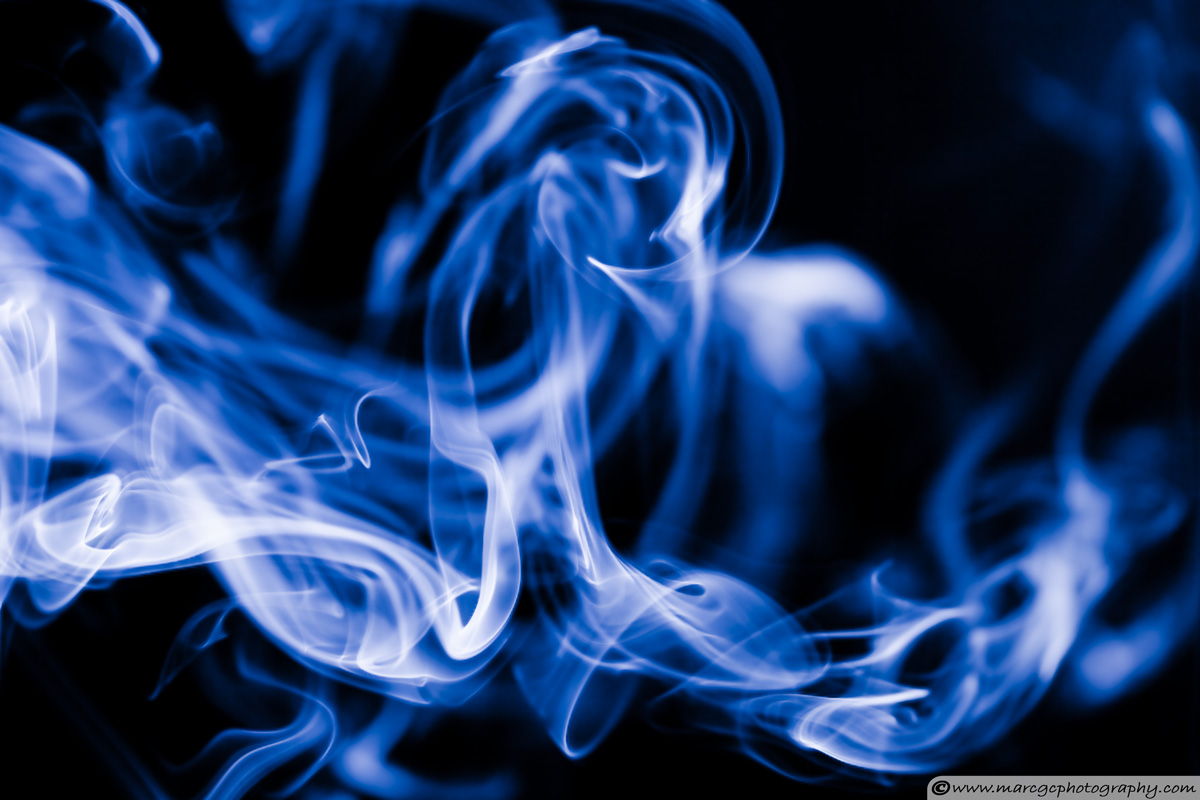
 Smoke Photography Example
What Do You Need?
[bscolumns class=”one_half_no_bottom_margin”]
- A camera with either a standard or macro lens
- A black non-reflective background—I use a piece of cotton velvet, as it works best to avoid light reflections. If you cannot find cotton velvet, nylon velvet will work as well.
- An off-camera flash with light modifiers, such as a snoot or a barn door
- Camera tripod (It is not completely necessary but I prefer to use it.)
- Incense sticks or other smoke sources
- Remote shutter release (Optional)
[/bscolumns][bscolumns class=”one_half_last”]
[/bscolumns][bscolumns class=”clear”][/bscolumns]
Smoke Sources
There are several different sources you can use to create the smoke. The easiest to work with are incense sticks, incense cones, and candles. You can use cigarettes, but I do not recommend it for a few reasons; they expensive, they do not photograph better than candles or incense, and worst of all they are not good for your health.
It is possible to get interesting images using candles; in this image, the picture captures the moment of extinguishing the candles. To capture an image like this, my advice is to use a short, strong puff of air rather than a slow, long one. The candle will be extinguished and the smoke will rise immediately for a span of one or two seconds, allowing you to capture your desired image.
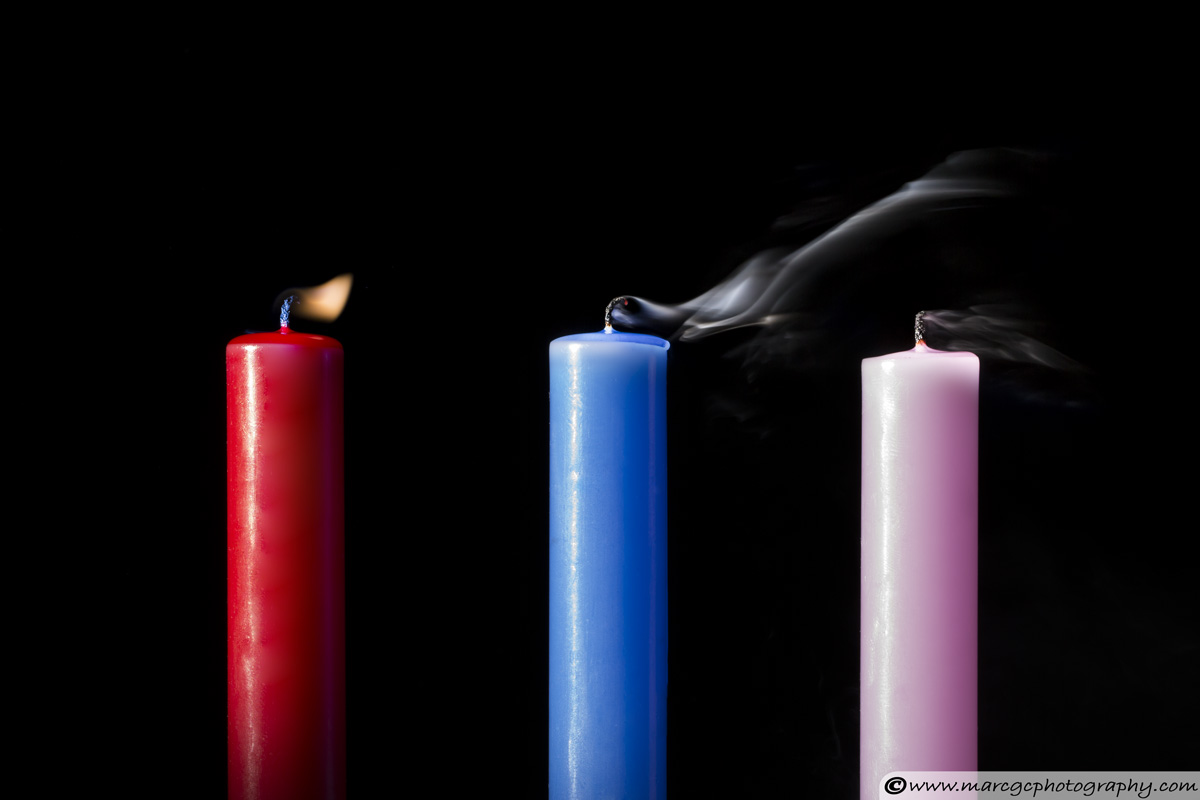 Candle Smoke Example
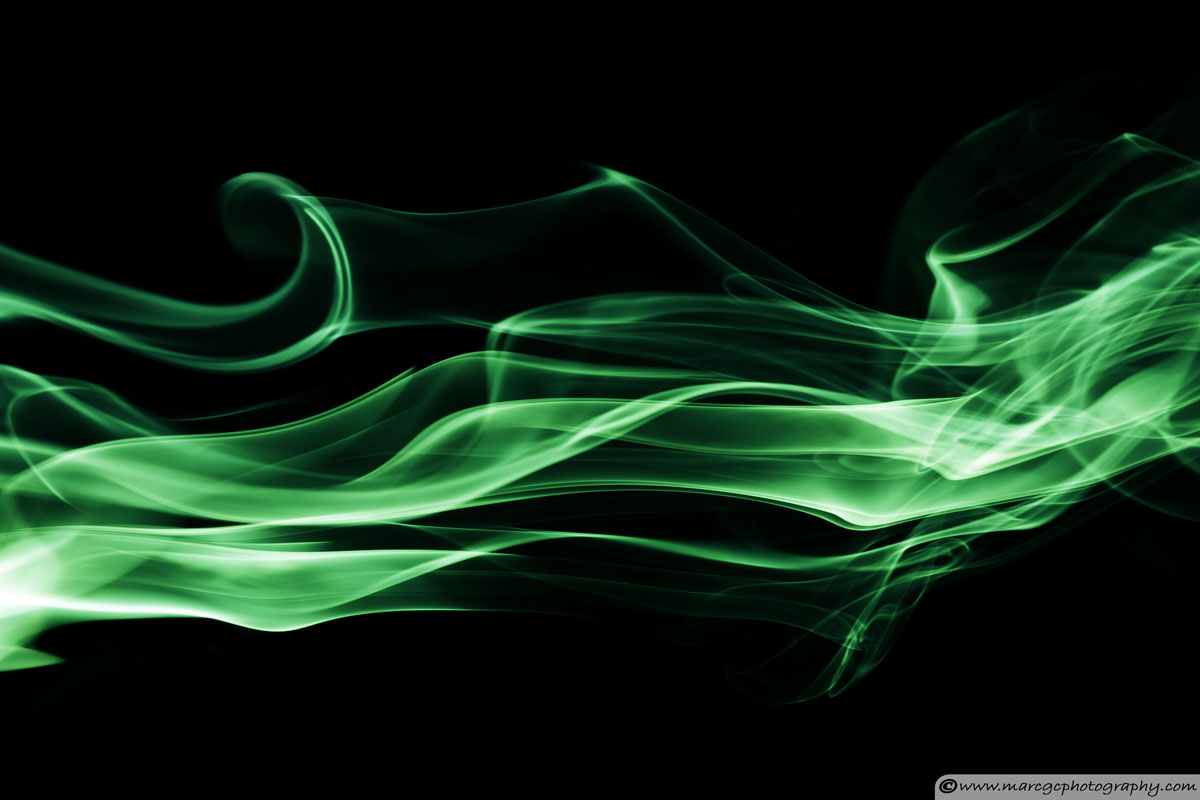
Using incense, you will get a steady stream of smoke, which is perfect for our purpose. They are many different types of incense and they each tend to create slightly different results when we saturate the photograph in post processing.
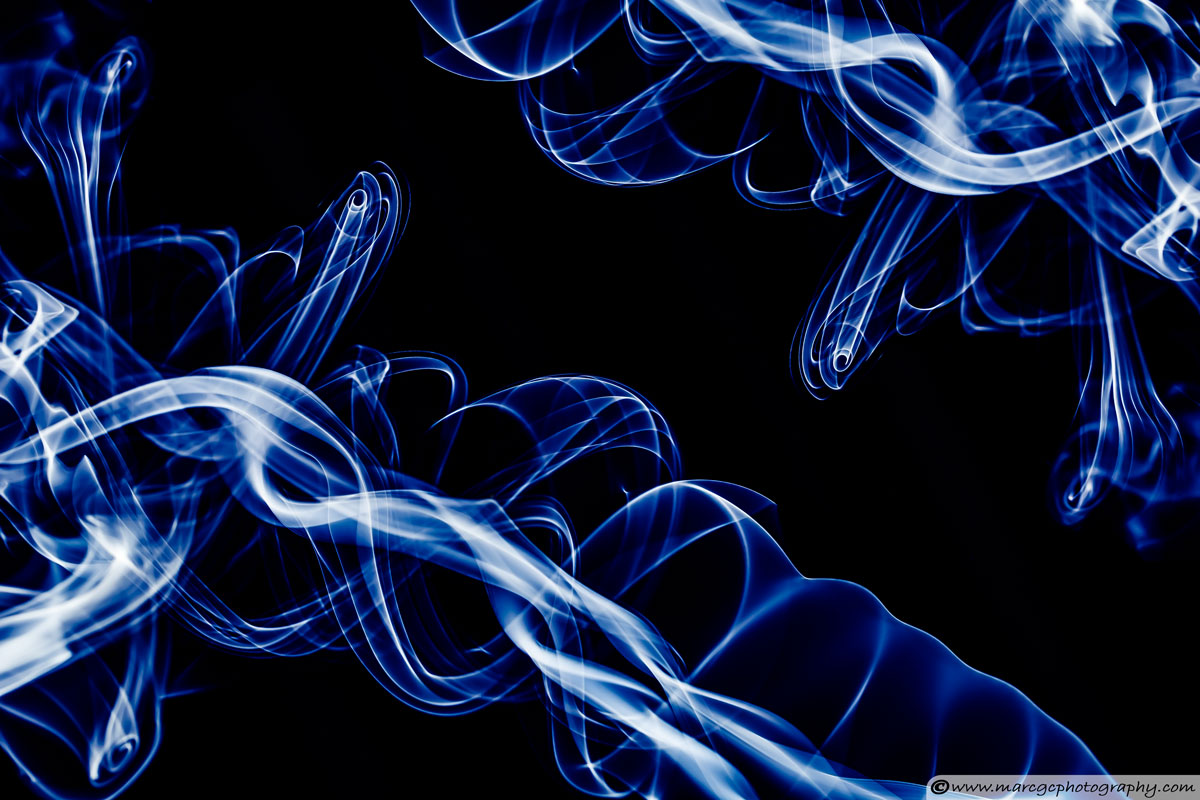
 Incense Smoke Example
I have mentioned the other possible smoke sources, but this article will focus on the use of incense sticks. It is the easiest way to create smoke and to create the abstract pictures you are looking for.
Choose the Right Place to Shoot
First, you have to find the right place to take your photos. The shoot should be set up indoors, in a draught-free location, to ensure you have full control of the smoke plume.
Ventilation is also important; after a while, the smoke will create a cloud in your studio. You must ventilate it regularly for your own health, and for the sake of your photograph’s contrast. Having a lot of the smoke left in the air from previous shoots will scatter the light, making your background appear less black that it should be. Even worse, the sharpness of your photos will be decreased.
To avoid the cloud effect, it is better to work in a cool room. Smoke rises up because it is hotter than the surrounding air and shooting in a cold room will help to maintain the cloud closer to the ceiling. Sometimes, I even use small candles around the incense stick to help raise the smoke so it is easier to photograph.
When shooting this subject matter, I recommend only shooting for 10 to 15 minutes. In that time, you will have captured many images to review and, in some cases, you will detect small setup problems that you will want to modify for the next session. Keeping the session time short allows you to assess your setup more often and ensure it is functioning efficiently.
The Setup
As with many types of abstract photograph, there is no one perfect setup for photographing smoke, especially talking about the lights used in the process. In the next paragraph, I will explain how I prefer to setup the session and lighting to capture it, but feel free to experiment to get the exact result you are looking for.
The goal for this type of image is to get as much contrast between the black background and the smoke as you can. To do that, we start by placing the background as far away from the smoke as possible; this will also make subsequent light setup easier.
The distance between the smoke and the camera will depend on the lens you are using and the area you want to capture. I recommend starting with a distance of one meter, but experiment a little bit until you get the best composition for your location and camera.
The next step is to setup the lighting. Shooting with your on-camera flash is totally forbidden because you will be adding light into the background and this is exactly what we have to avoid. Instead, you will have to work with remote flash units pointing to the smoke.
Personally, I like to use two off-camera flash units with a snoot around each one. I place them on the sides, pointing directly to the smoke. This will produce a narrow beam of light that will not affect the camera or the background.
If you do not have snoots at home, you can create your own quickly and easily. The full process is outlined in my article “Creating Your Own Snoot”. It is a DIY project where you will learn how to create them with little effort, money, and time.
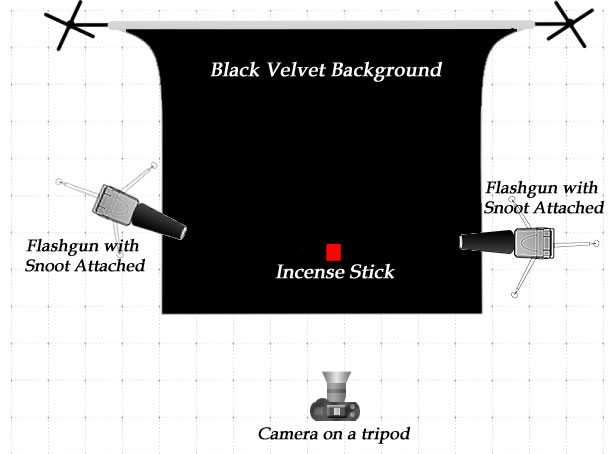 Lighting Setup Diagram For Smoke Photography
You can slightly change this setup, but always keep in mind that the background and the camera cannot receive direct light from your flash units. Also, try to avoid lighting the smoke from below, because this is the densest part of the smoke, and it can produce odd results.
Camera Settings
These recommended settings are a good start to it to capturing a strong smoke photograph. As always, feel free to experiment once you have a good feel for the image and the setup.
– Keep your ISO value as low as possible; more ISO will mean more noise in your photos, which can be a big issue in the post processing.
– Shoot in the RAW format; you will have more flexibility for post processing without losing image quality.
– The smoke moves much faster than it looks and your shutter speed must be set to keep up. Shooting at 1/250 or faster, you will be able to get sharp photograph.
– You will want to have your images completely in focus. To make this easier, you will have to use the highest aperture available. This will be determined by the amount of light produced by your flash units; if you can add a lot of light, you will be able to push your aperture. Experiment until you get an aperture between f/8 and f/16.
– Exposure will be also critical and for this subject matter, the histogram is not going to be very helpful. The best way to proceed is to take a few shots and then process them. Over exposure will result in a loss of detail in the smoke and under exposure will make the smoke appear to be attached to the background, without the contrast needed to get good photographs. To determine if you have the right exposure, be sure only the brightest parts of the smoke are pure white.
– Shoot in manual mode. Selecting the right aperture and shutter speed can be tricky, but in the end, you will get better results. Taking your photos in AV or TV modes can cause your camera to produce different results from shot to shot, which can be very frustrating.
Taking the Photograph
As I mentioned before, focus is important; a sharp image is interesting, but an out-of-focus photo loses its value. It is always possible to improve the focus on post processing, but try to get the sharpest shot from the camera to reduce the number of post processing changes.
To achieve the highest possible focus, I put an object where the smoke is expected and focus the lens on that point. I usually use a long plastic ruler; I put it vertically over the incense stick and I easily focus the camera on the small numbers. This small detail will help ensure that the camera is prepared to capture the smoke when it is created.
It is important to notice that you should take your pictures in the dark. However, a small desk lamp or a flashlight pointing to the smoke column will be useful to determine the right moment to press the shutter release. If you are not sure about the effect of this light on your photograph, try to take a test shot without using any of the flashes. If the test image is completely black, then you are ok. If it is not, reduce the amount of light and ensure that is not pointing at the camera or the background.
After lighting the incense, in still air conditions, a straight smoke column will rise and at a certain height, it will start to create a turbulence patterns, providing us with nice shapes to photograph. You can try to manipulate these patterns by blowing gently near the smoke, stopping and controlling the smoke with your bare hands, or using tools, like a spoon, a funnel, or anything with holes in it, to modify the smoke’s behavior.
It is also useful to have a remote shutter release because you will not have to use the viewfinder to see the subject matter, and it gives you more room to influence the smoke. It is better to focus on the smoke and manipulate it to get new fantastic shapes, than to be waiting for a good shoot to happen behind the viewfinder.
Post Processing Tips
After a session, you will end up with many photographs to edit. I usually do a quick skim and select only my favorites to work with. They should be good, with a great focus and with nice shapes; otherwise, I prefer to complete another shooting session as soon as the studio air is ventilated.
To decide which images are the real winners, I will start experimenting with them. I like to change some of these settings: contract, temperature, exposure, black point, and crop when necessary. Be careful, and do not to push too hard on the contrast and exposure, or you will end with an image full of noise.
Sharpening and noise reduction are valid options, but use them with caution. Too much sharpening and your picture will be full of artifacts. Too much noise reduction and your image will lose a lot of sharpness. Trust your own judgment, but do not forget to zoom in periodically as you work to see how each setting is affecting the image.
Now, with the selection process finished, you are ready for final editing. First, clean up your photo and be sure that the background is pure black.
Smoke dust spots are to be expected in this kind of photograph, especially if you had a long session. You will have to scan the whole picture looking for them, and then cleanup these spots using a tool like the ‘Spot Healing Brush’ on Photoshop.
 Typical Smoke Photograph with Black Background
There are several ways to present smoke photographs. These are the most common, but feel free to experiment and create your own artistic vision:
1) Setting white color as the background: obviously, to capture this directly from the camera would be extremely difficult, as the smoke itself is white and we had to use the black background to capture it. However, inverting the image in Photoshop it is all you have to do to achieve this effect.
 The Same Photograph after being Inverted in Photoshop
2) Applying color masks to the smoke: start by opening the Hue/Adjustments panel or create a more colorful photograph by adding a gradient fill layer, like in the example below.
 Smoke Photograph with a Color Gradient
Once, I tried to capture the color directly from the camera by using color flash gels. The resulting image was beautiful, but was no better than altered digital versions. Therefore, I prefer to edit it digitally and change it until I get the perfect one for each photograph.
3) Combine different captures in one picture: in Photoshop is easy to add different smoke trails or clone the original photograph in layers to end up with a unique image, like the one below.
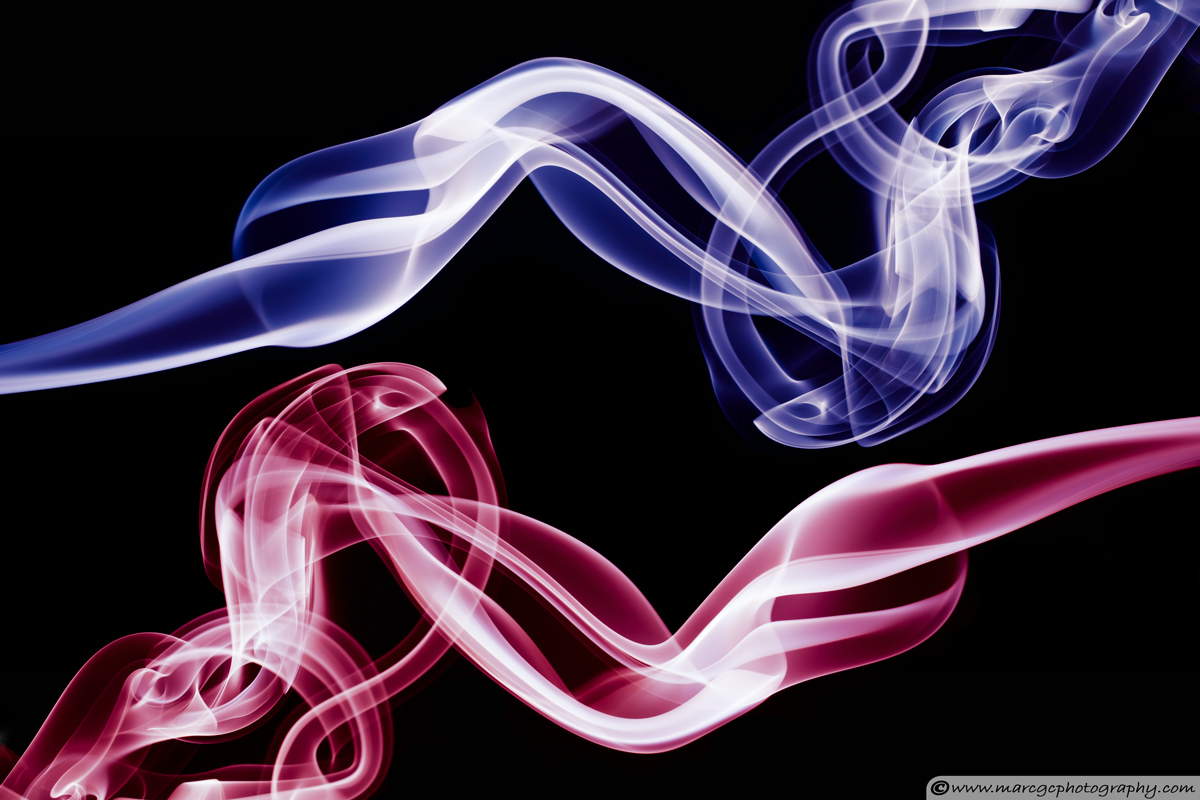 Combined Smoke Trails in the Same Photograph
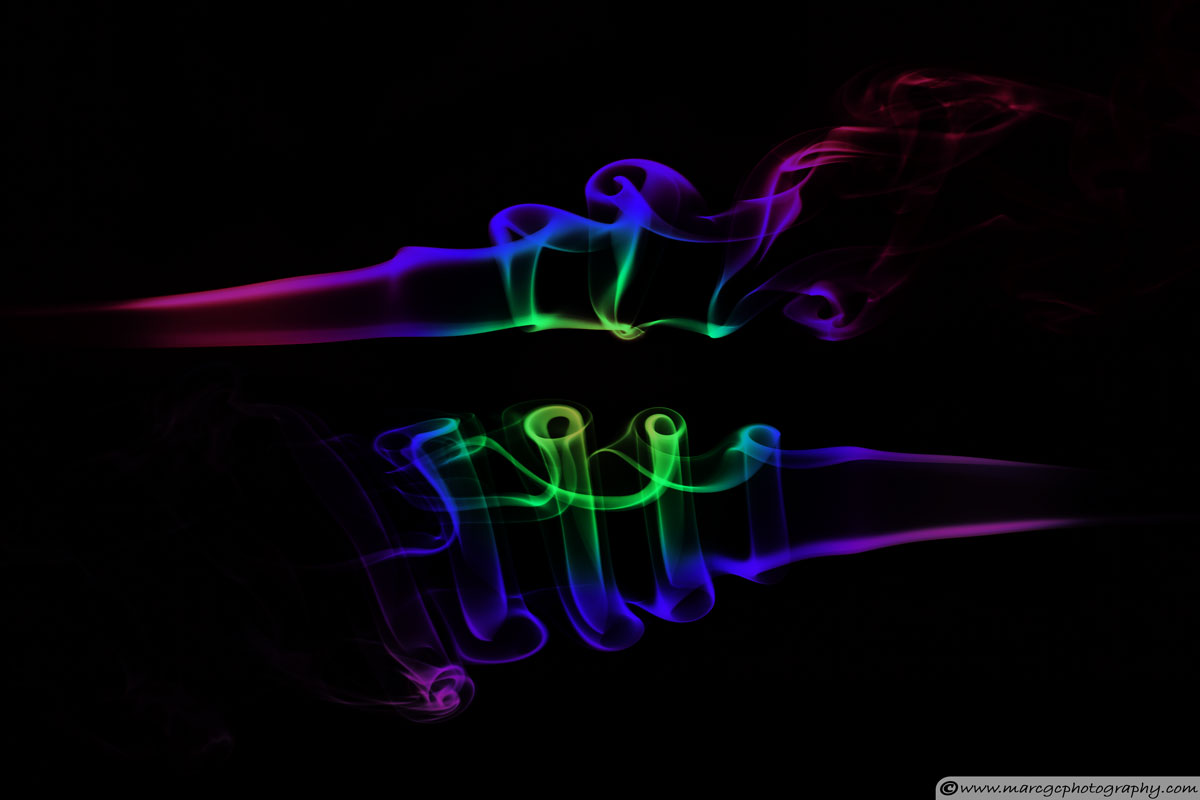
4) Mirroring smoke trails to create a fascinating fractal-like photograph: clone your photograph and rotate it horizontally to produce this kind of abstract image.
 Mirrored Smoke Patterns
Conclusion
Creating this kind of photograph is not difficult, but it can require experimentation until you get your perfect setup for the shot. The post processing is also important and will require all of your creativity if you want to create the most amazing photos. For me, the results achieved by this technique are truly exciting and each one is a piece of art, unique and unrepeatable.
I really love this technique and I would be happy to see your comments and your own photos in the section below. If you have questions, just let know and I will answer as soon as possible.
Excellent tips and photos, thanks for sharing!
My pleasure Sam, I’m glad you like the article!